To enhance the streaming experience, you probably want to watch Netflix in the highest quality possible. This article will share some useful ways on how to change or adjust video quality on Netflix mobile app, web player. Besides, you will get extra tips to download HD quality videos from Netflix to your computer locally.
In the digital age of streaming, Netflix has become synonymous with on-demand entertainment. Netflix offers different video quality options based on your membership level, the resolution of video source, and your network environment. You can stream Netflix titles to your devices from 480p SD, 720p HD, 1080p HD, and even 4K. However, sometimes your internet connection might not deliver the best video quality, fear not! In this guide, we’ll explore how to change or adjust video quality on Netflix effortlessly. In addition, you will also learn how to download HD videos from Netflix to watch offline on all your devices!
CONTENTS
Know More About Netflix Video Quality Settings
“Does Netflix have a video quality setting?” Yes! Based on your subscription plan, Netflix offers multiple resolutions: Auto, Low, Medium, and High. You can change to a higher quality to get a better streaming experience. Before adjusting your Netflix stream quality, it’s necessary to understand the available video quality settings on Netflix.
Auto (Default): Netflix automatically adjusts the video quality based on your internet speed and device capabilities.
Low: Provides basic video quality, suitable for slower internet connections. This setting uses less data, making it ideal for users with limited bandwidth.
Medium: Balances video quality and data usage. It’s suitable for users with moderate internet speeds who want a decent viewing experience without consuming too much data.
High: Offers the best video quality possible. This setting consumes more data and requires a faster internet connection for optimal performance.
Next, let’s explore the step-by-step process to adjust or change video quality on Netflix app and web player.
Method 1: Adjust Netflix Video Quality On Web Browser
Step 1. Open your web browser and go to the Netflix website.
Step 2. Log in to your Netflix Standard/Basic/Premium account using your credentials.
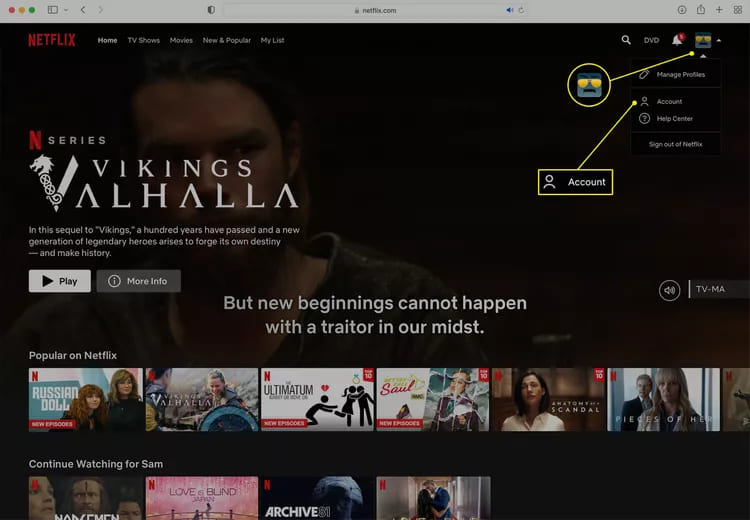
Step 3. Click on your “Profile” icon in the top-right corner and choose “Account”
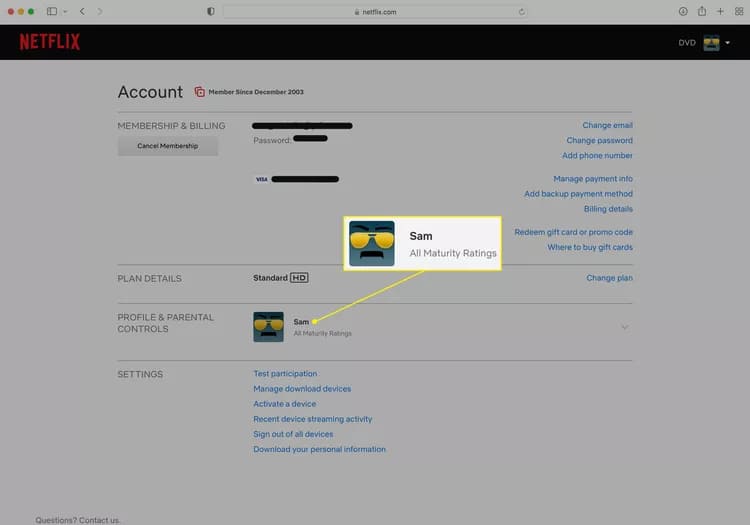
Step 4. Scroll down to the “Profile & Parental Controls” section, and tap “Arrow”.
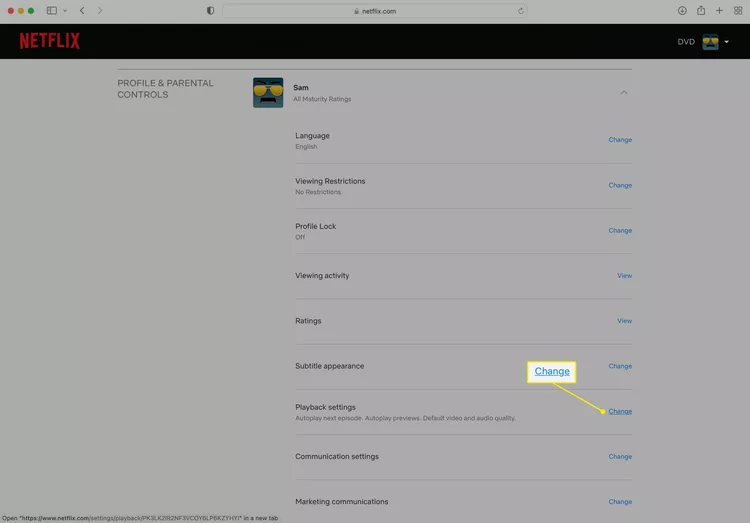
Step 5. Click on “Playback Settings” and click “Change”.
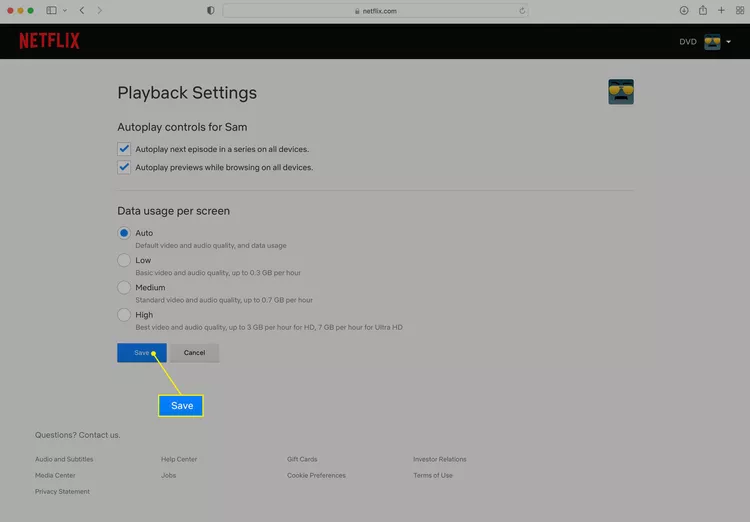
Step 5. Choose the desired video quality from the available options: Auto, Low, Medium, or High. Then click “Save” button.
Method 2: Change Video Quality On Netflix App (iOS/Android)
Step 1. Launch the Netflix app on your iOS or Android device, and sign in to your Netflix account.
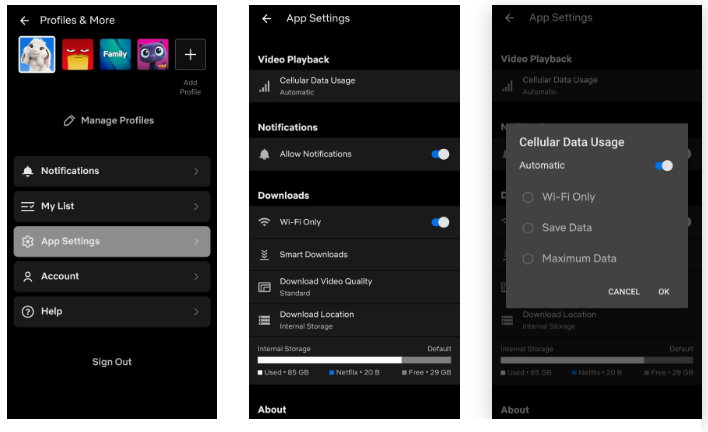
Step 2. Tap on the “Profile” icon at the top right corner.
Step 3. Tap on “More”, and select “App Settings”.
Step 4. Find “Video Playback” > “Cellular Data Usage”.
Step 5. By default, it may be set to “Automatic”. If you have enough cellular data, you can change to the “Maximum Data” option.
Method 3. Change Video Quality in Netflix App for Windows 10/11
Step 1. Open the Netflix app on your Windows 10/11.
Step 2. Sign in with your Netflix account, and tap “My Netflix” in the lower right.
Step 3. Tap three dots in the upper right, and select “App Settings”.
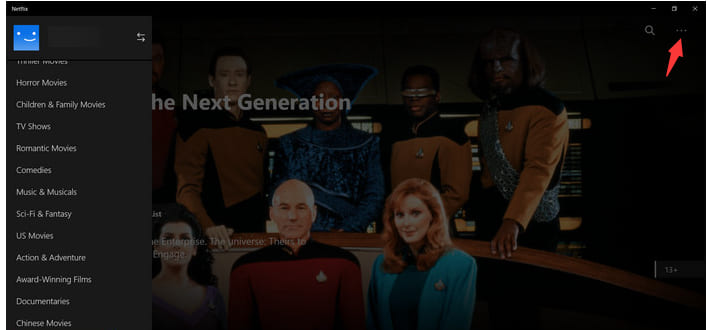
Step 4. Tap “Download Video Quality” or “Video Quality”.
Step 5. Select either “Standard” or “High/Higher” based on your preference.
Step 6. Confirm your selection by saving the changes.
Benefits: Download HD Videos from Netflix to PC/Mac
If you have a Netflix Ad-Free account, you can even download and watch Netflix HD videos offline. But the Netflix downloads have 30-days/7-days viewing duration. Once you start viewing, it will expire 48 hours. And you cannot transfer any Netflix downloads to other players or devices. Luckily, you can use a third-party Netflix downloader to save your favorite Netflix videos permanently. Here we bring the powerful 4kFinder Netflix Video Downloader.
4kFinder Netflix Video Downloader has the capability to download unlimited movies and TV shows from Netflix to computer in full HD 1080p or 720p, improving your streaming experience. And the downloaded Netflix videos will be saved as .mp4 or .mkv format, so then you could keep them forever and enjoy high-quality Netflix videos on any device. For example, you can transfer the Netflix videos to your smartphone, tablet, USB drive, and more devices for flexible playback.
The built-in Netflix web player allows you to directly search and add any Netflix title without the Netflix app! What’s more, it will also keep the original surround sound and offers multilingual subtitle and audio track.
Features of 4kFinder Netflix Video Downloader:
- Download any video title from Netflix to Mac/PC.
- Download Netflix movies and TV shows to MP4 or MKV.
- Download and save Netflix videos in full HD 1080p, 720p.
- Batch download high-quality Netflix videos in batches.
- Keep 5.1 surround sound, multilingual subtitles & audio tracks.
- Built-in web browser, no Netflix app needed.
- Keep the downloaded Netflix videos forever, no expiration.
- Transfer and watch Netflix videos on all devices without network.
How to Download Netflix Videos in HD 1080P MP4?
Step 1. Launch 4kFinder Netflix Video Downloader
Download, install and launch the 4kFinder Netflix Video Downloader on a Mac or Windows computer. Log in to your Netflix account to access the Netflix video library.
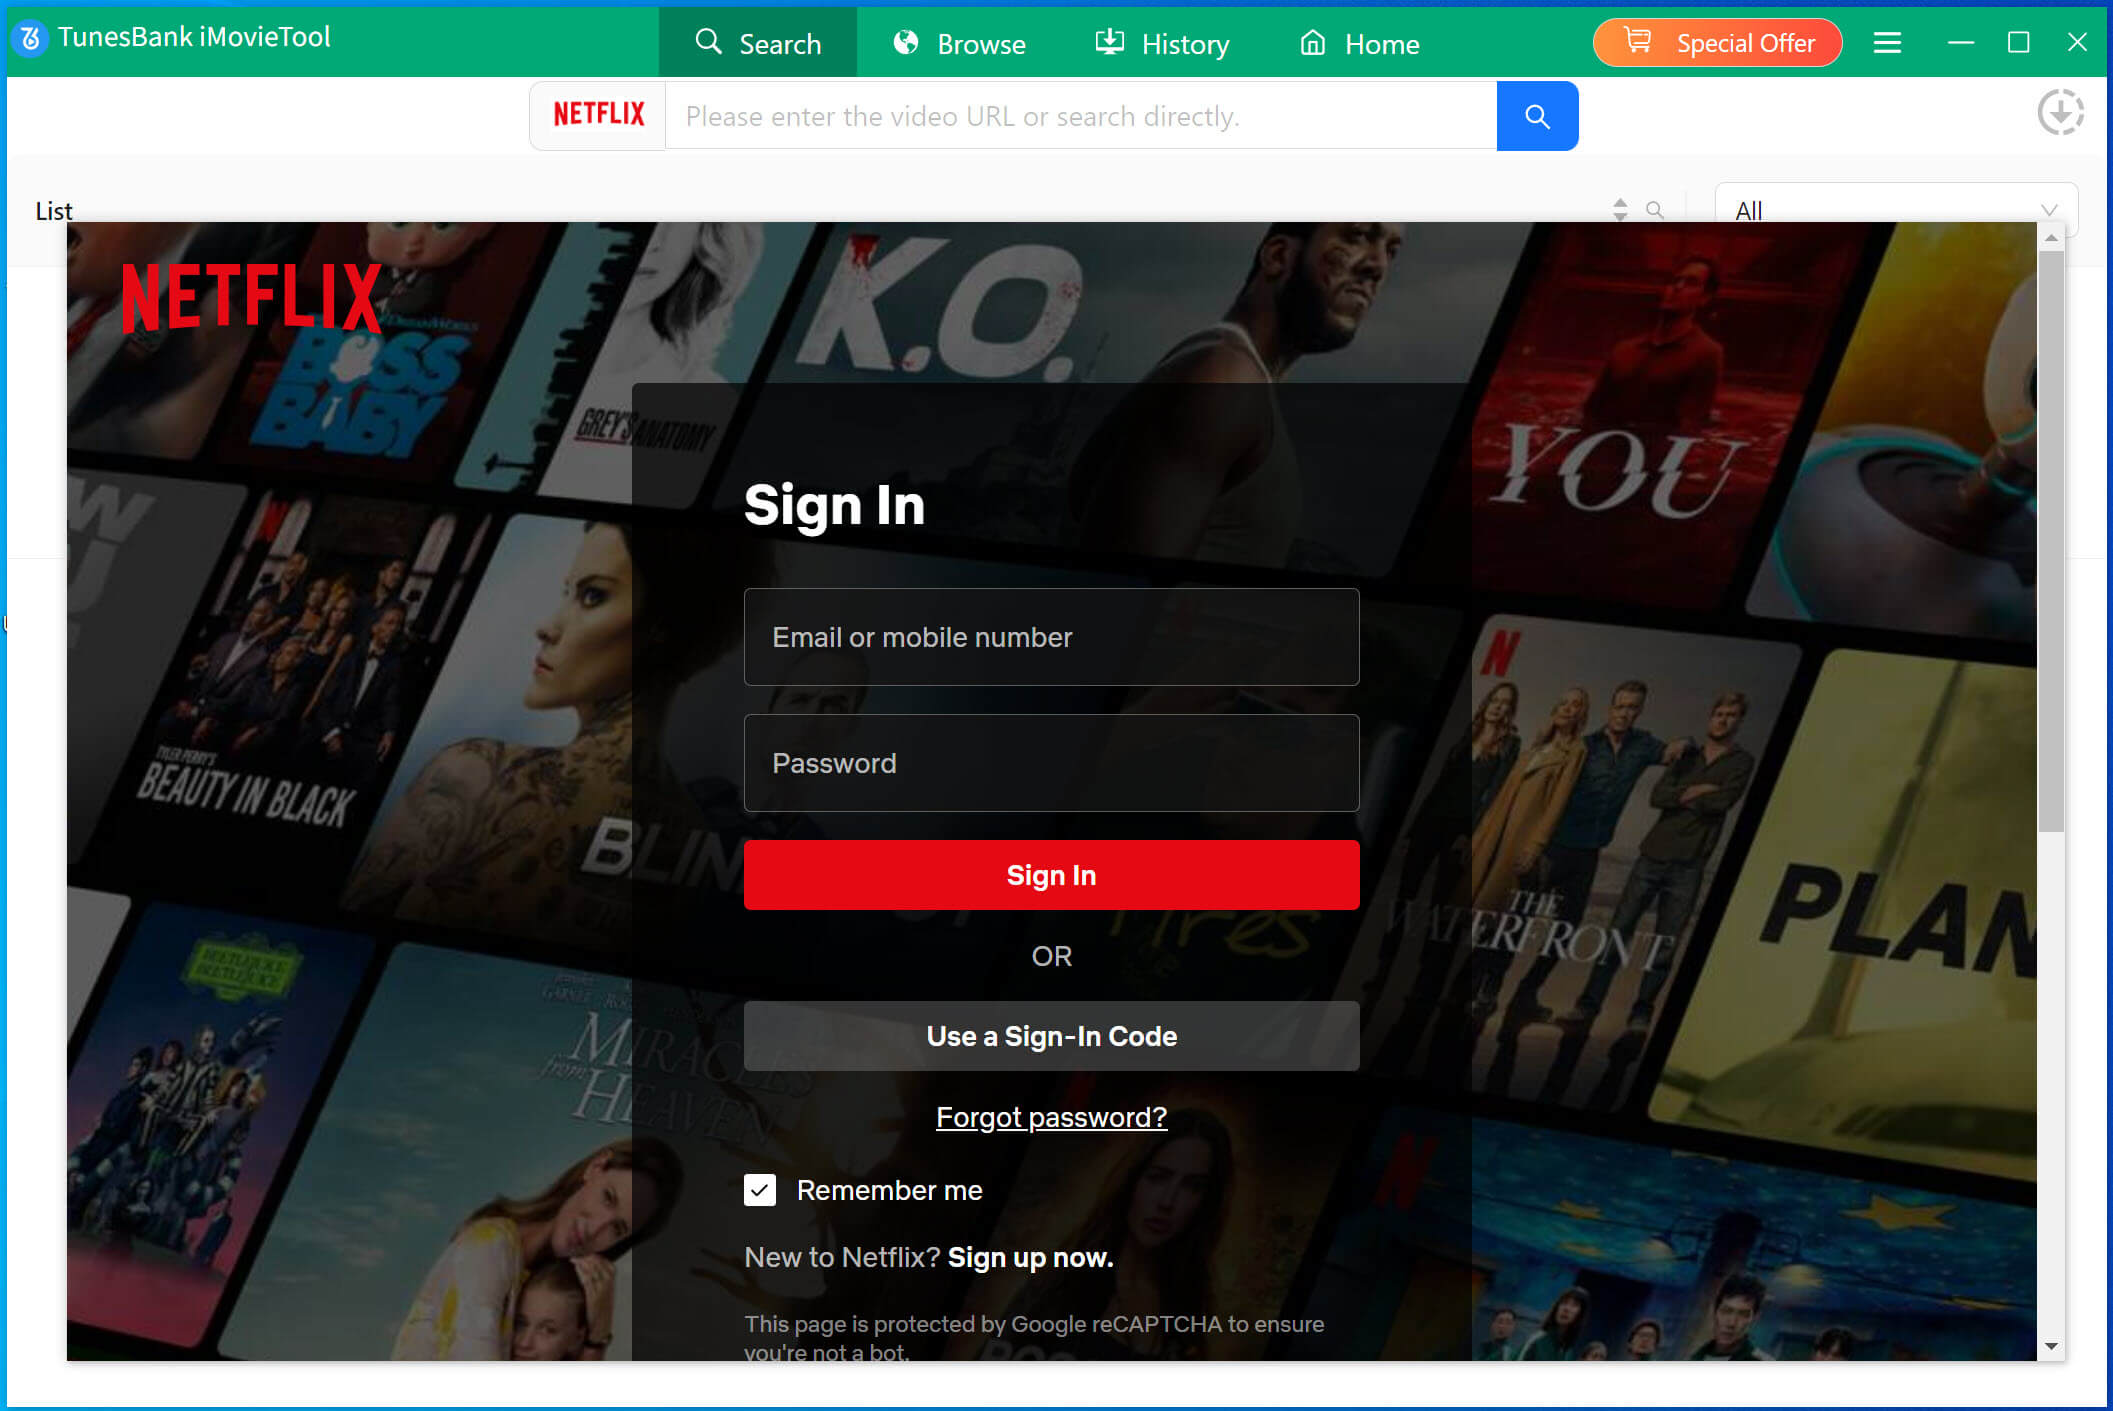
Step 2. Add Netflix Movie/Show
With a searching function, you can search for any Netflix video by entering the keyword or pasting the URL to it.
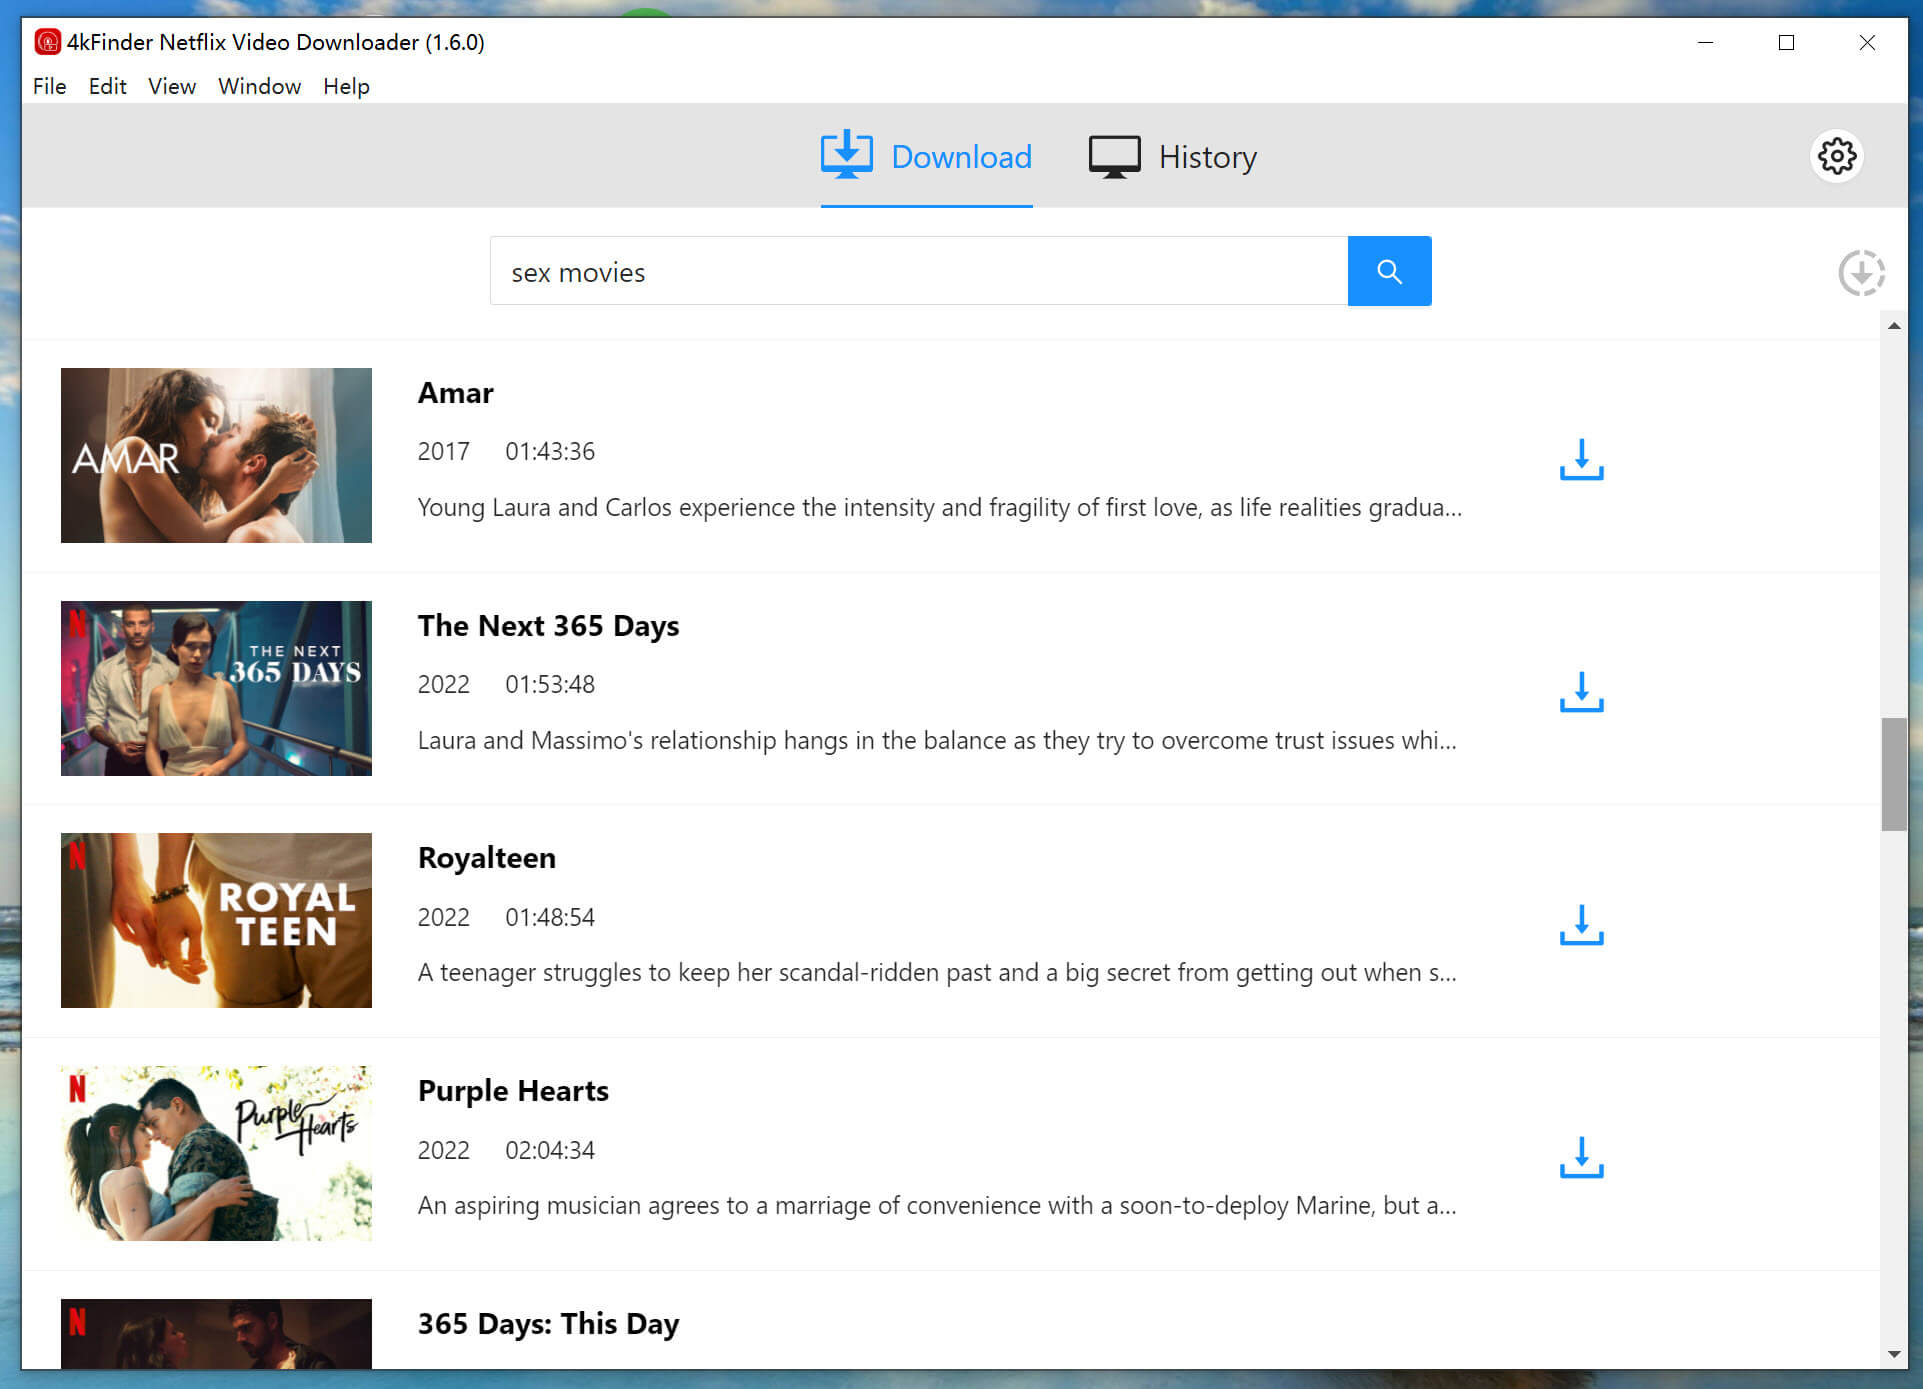
Step 3. Select HD Quality
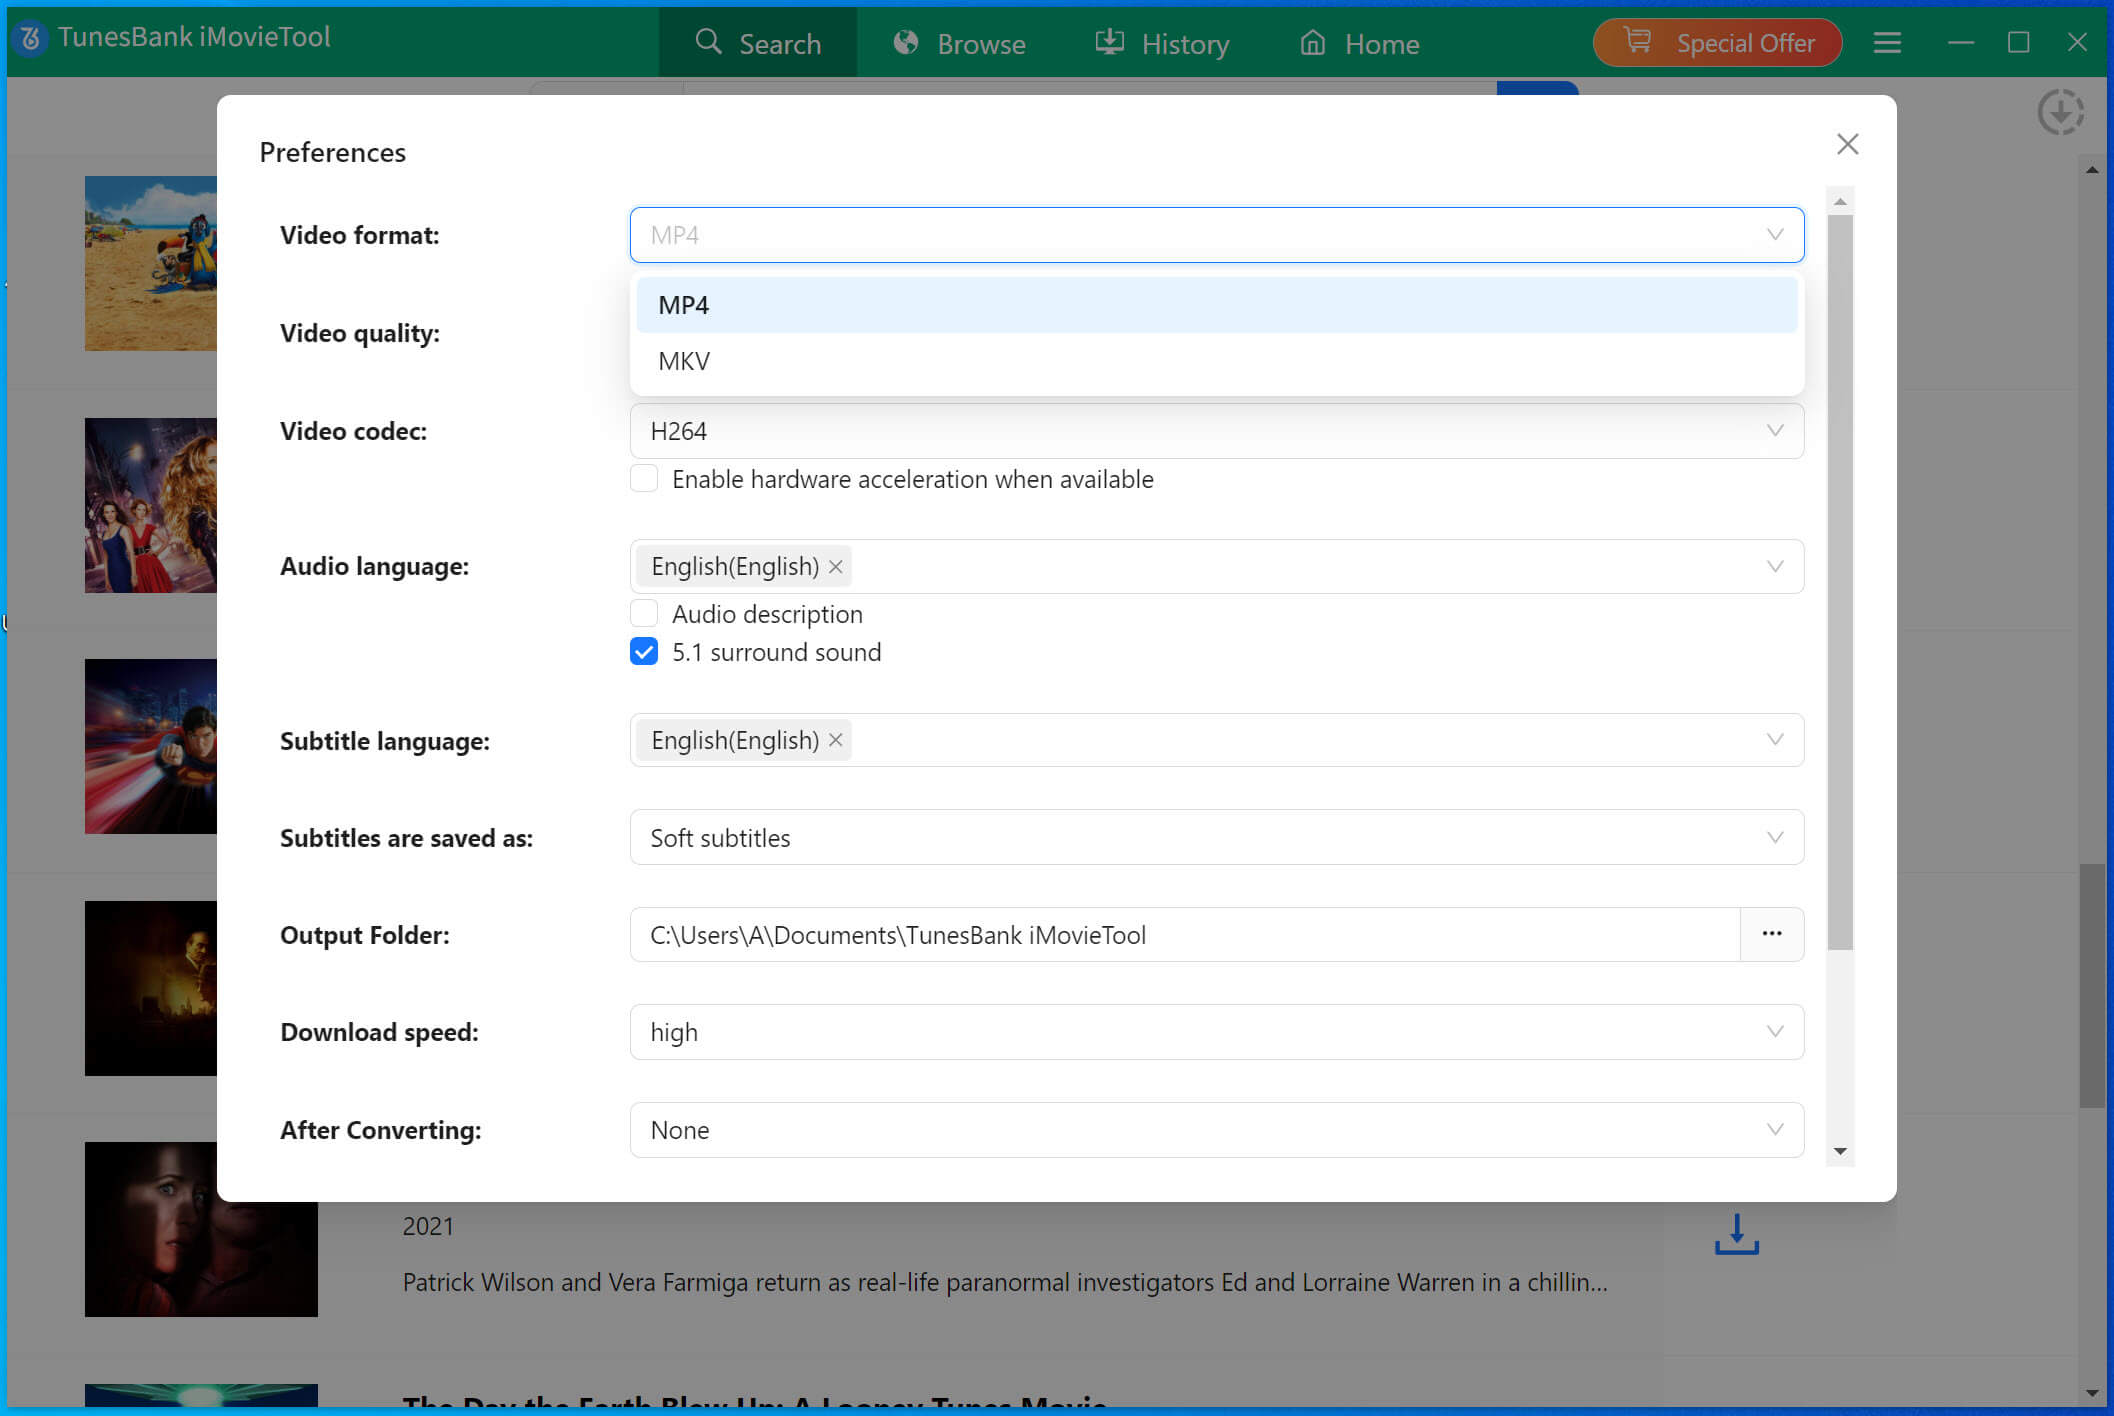
Next, open the settings window by clicking the “Gear” icon at the upper right corner. Select “High” from the “Video Quality” option, and change other settings as you like.
Step 4. Start Downloading HD Video from Netflix to MP4
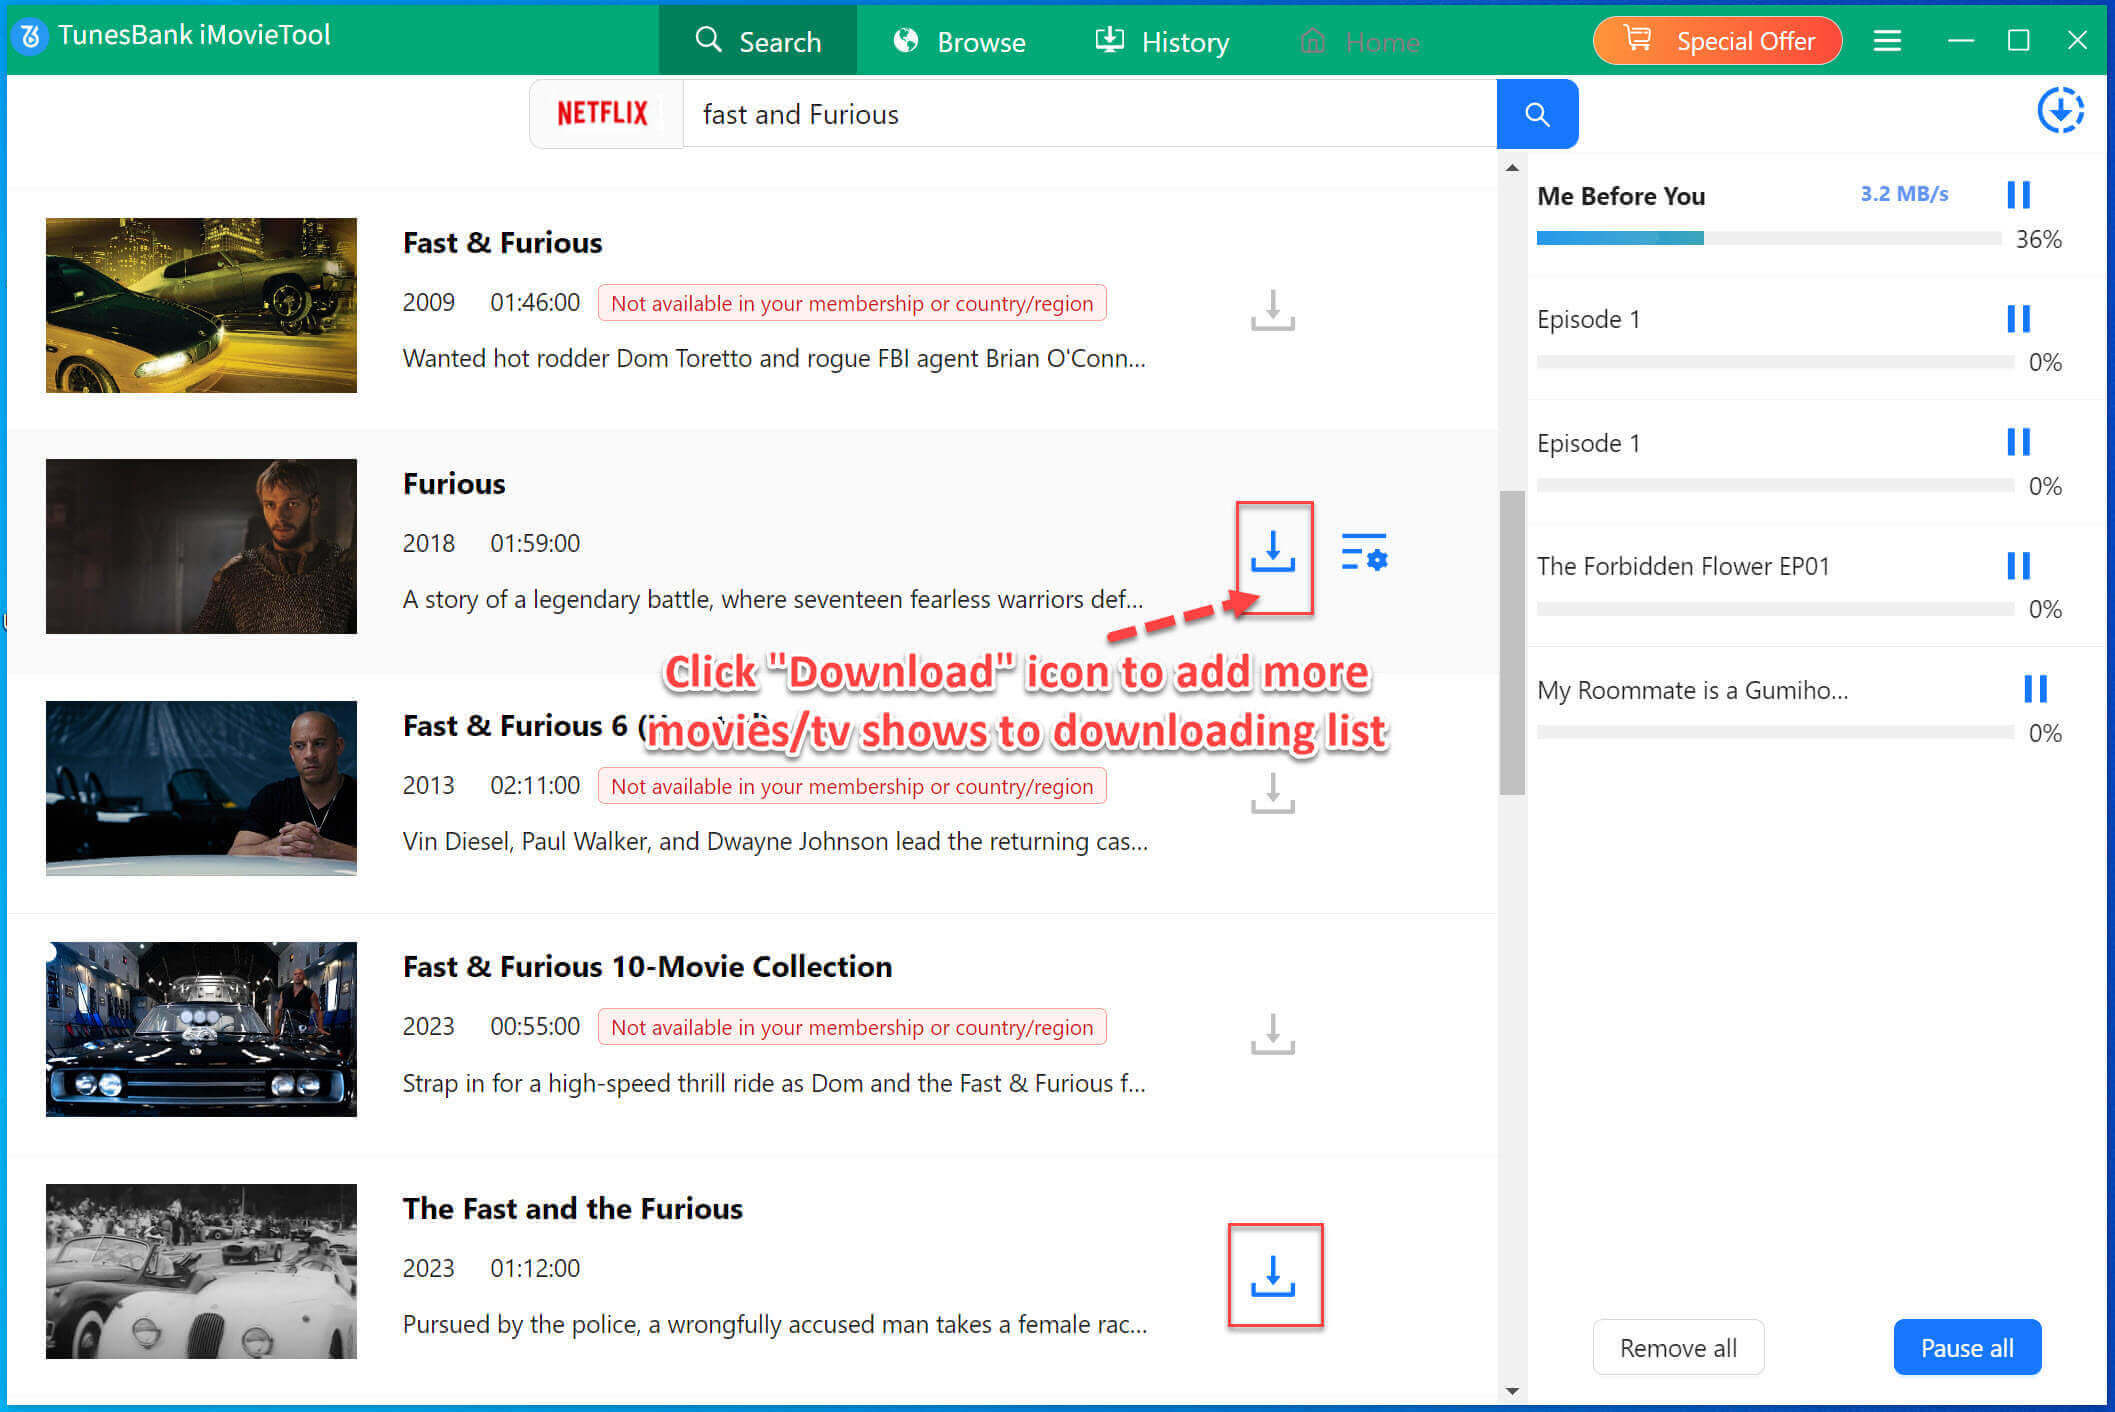
Click the “Download” icon next to the video title to start downloading HD video from Netflix web browser to your computer.
Step 5. View Downloaded Netflix Videos
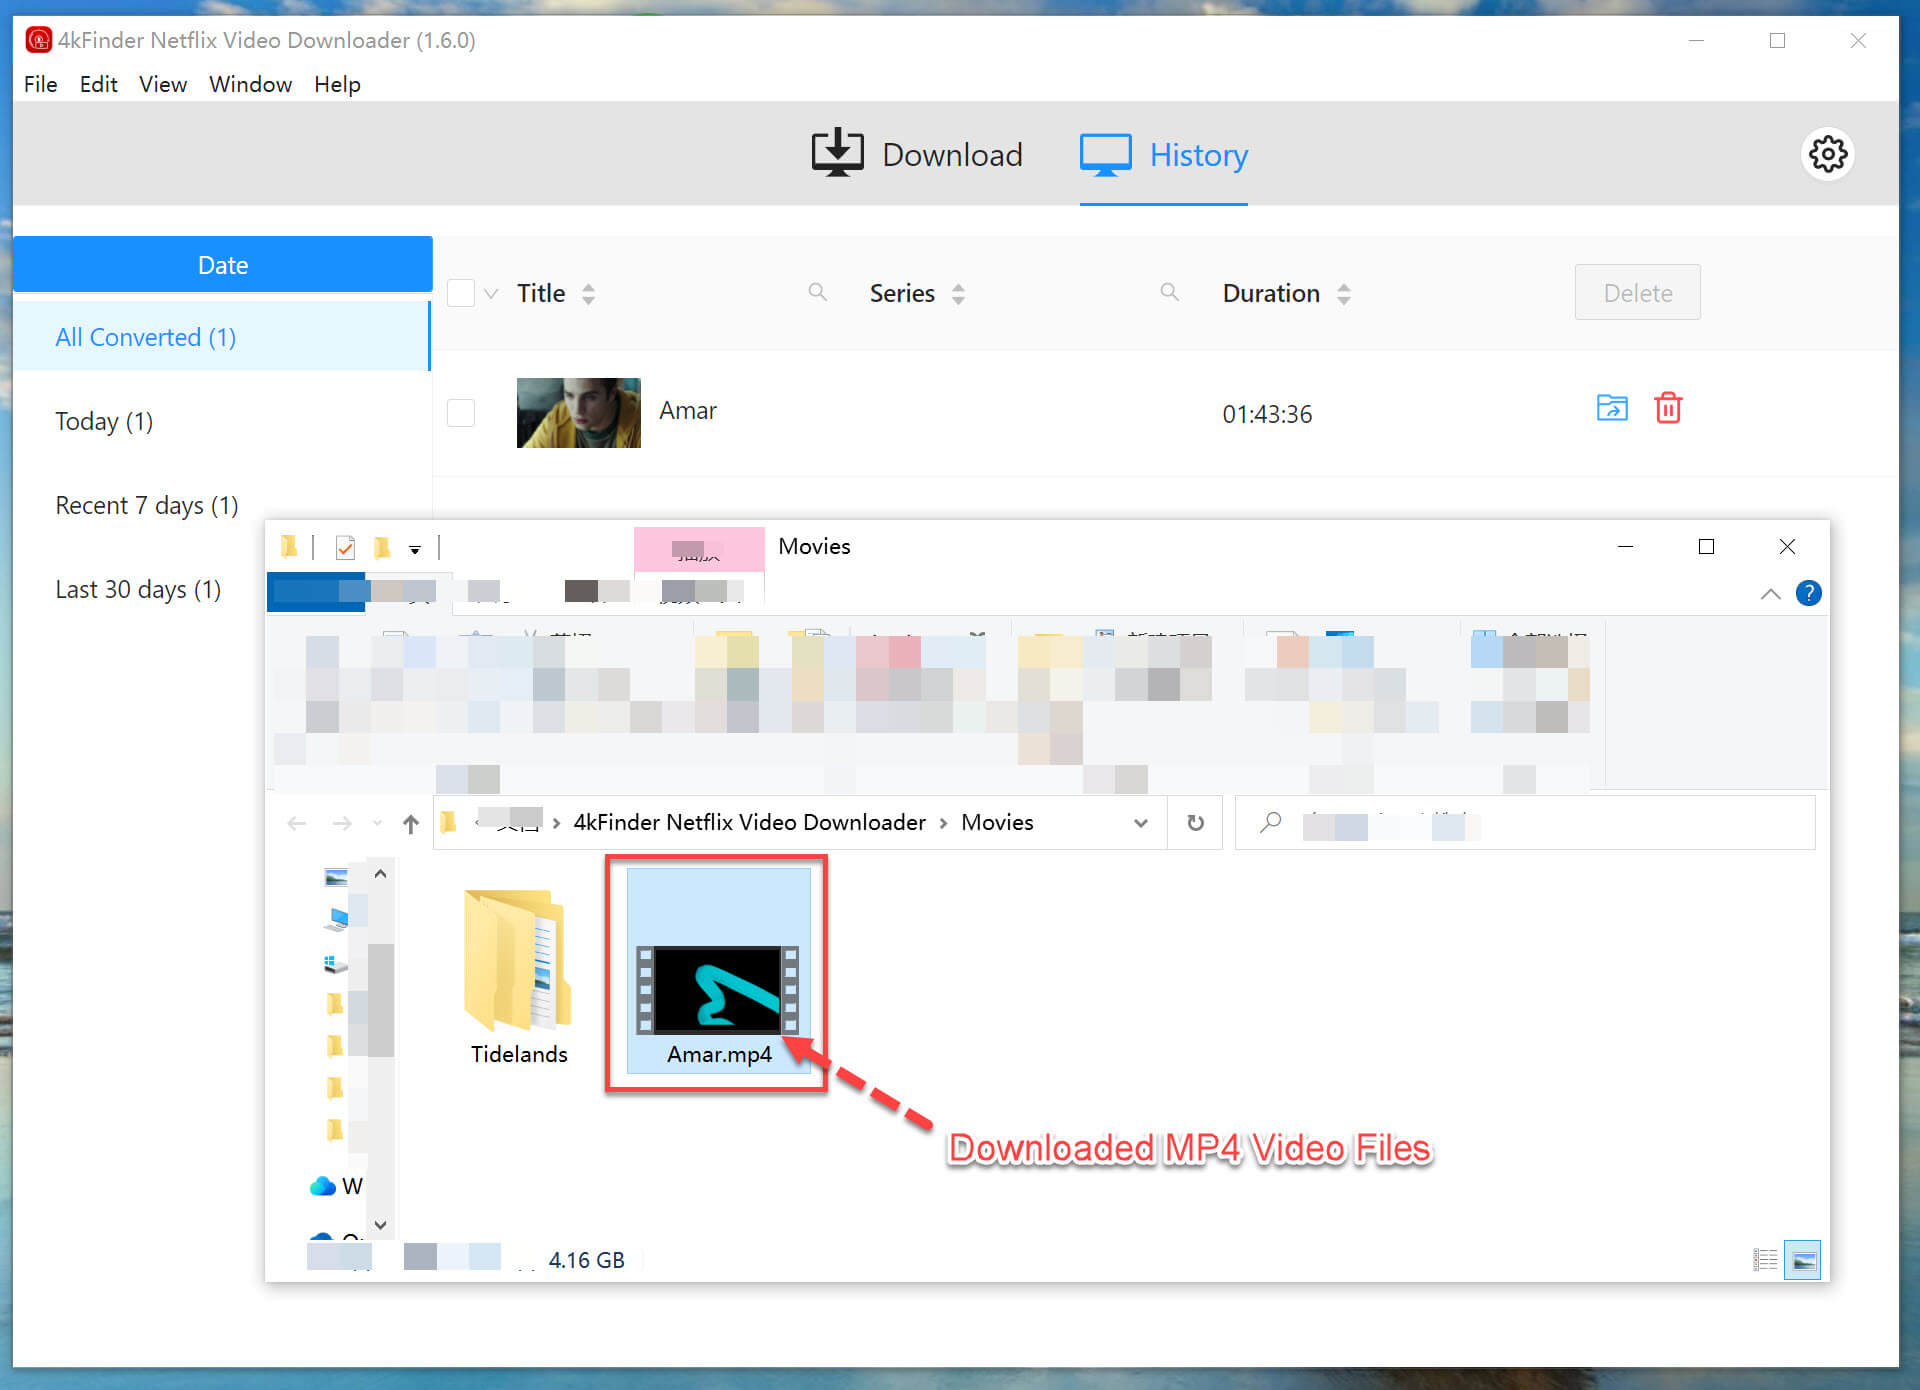
After the download is complete, you can go to the “History” section to view the well downloaded Netflix videos. Click the “blue folder” icon to locate the HD Netflix videos on local folder.
Extra Tips for Optimizing Your Netflix Experience
Apart from adjusting video quality settings on Netflix app and website, here we also list some tips to enhance your Netflix streaming experience:
1) Check Internet Speed:
Run an internet speed test to ensure your connection can support your desired video quality.
2) Use Wi-Fi for Stability:
Connect to a stable Wi-Fi network for smoother streaming, especially when choosing higher video quality settings.
3) Close Unnecessary Apps:
Close background applications on your device to allocate more resources to Netflix, reducing the likelihood of buffering.
4) Update Netflix App:
Keep your Netflix app up to date to access the latest features and optimizations.
5) Upgrade Subscription Plan:
Consider upgrading your Netflix subscription plan for higher-quality streaming if your internet speed allows.
6) Monitor Data Usage:
Be mindful of your data usage, especially if you have a limited internet plan. Lower quality settings consume less data.
Conclusion
In conclusion, you can easily change Netflix video quality on iPhone, Android, Windows, Mac and other compatible devices through its official website or app. Adjusting video quality on Netflix is a straightforward process that allows you to customize your streaming experience based on your preferences and internet capabilities. But if you want to keep high-quality Netflix videos playable after unsubscribed, you can turn to 4kFinder Netflix Video Downloader. It is able to batch download Netflix videos to MP4/MKV in HD 1080p/720p, so that you can enjoy them anywhere! Now give it a try!
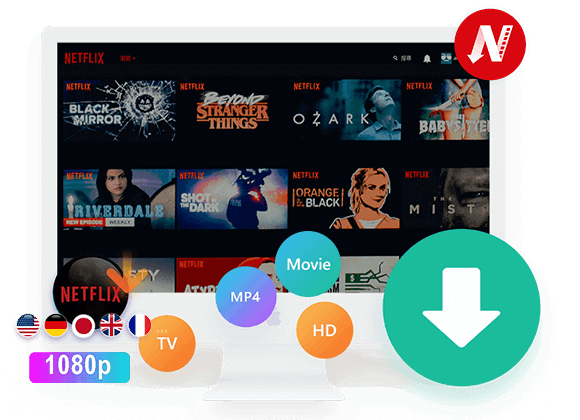
 Download Netflix videos to MP4 or MKV format in 1080P Full HD resolution.


One Reply to “How to Change or Adjust Video Quality on Netflix”
Comments are closed.